Salaric


February 28, 2017

Paper Pals – Workshop

Filed under: Kids Projects,Origami,Paper Craft,Workshops — sarah @ 7:23 am

Paper Pals and Theatre

Colour, fold, cut and stick a range of little paper friends complete with story boxes and mini theatre with changeable backgrounds using a combination of origami, puppet design and paper craft construction. Create shows and character play to take home with you – suitable for all ages and skill levels.

January 29, 2017

Muse Monster Book Corners

Filed under: Origami,Paper Craft — sarah @ 2:29 pm

Origami Monster Multitude Page Corners

I made these cute little page corners or book marks, I do do some cutting to make the teeth but you can also just make them with patterned paper with no eyes and cutting.

Muse Monster Book Corners or origami bookmarks

Materials:

1) Square paper – the size of the square affects the size of the page corner you produce and some papers fold better than others, I used small origami paper.

2) Eye stickers – I just bought a roll of these and origami paper often comes with face stickers of various sorts but you could also draw eyes onto the paler coloured papers or draw them on white card/paper and cut and stick them on. With pens be a bit careful as not all will stay nicely on the slightly shiny surface alot of the origami papers have.

3) Scissors

4) Colour pens/pencils – optional for drawing your own monster skin textures or messages on the inside.

folding paper

Method:

1) Fold the the square piece of paper along the diagonal so that two corners meet and it forms a triangle.

2) On edge of the triangle is where the fold is and the tip of the triangle is like two pieces of paper, fold the two tips along the folded “closed” edge so that the meet at the “open” tip, so that it is now a square or diamond shape depending on which way round you have it.

3) Allow the two little arms/folds you’ve just made to pop up as they wont want to lay flat, underneath is a diamond shaped area, fold the tip of this diamond up so that it meets the original folded edge i.e. the tip/triangle shape between the two “arms”. Make sure you on fold the top piece of paper from the “open” tip. Now the diamond shape should be made out of two triangles one being a flap you’ve just folded. This flap can be either on the outside in between the two arms or you can tuck it inside. Left on the outside it can leave a visible stripe if your paper is different colours or textures on each side.

4) Now fold the two arms in half tucking them up inside the little top triangle of the diamond so they wrap over the fold you’ve just made pinning it in place. You now have a little pouch with a triangle at the front and a diamond at the back. Stop here if you don’t want monsters!

5) Add eyes or other decoration.

6) Using scissor or crimping shears cut most of the single sheet of that sticks out from the triangle with a zigzag edge for the teeth.

7) If you want to hide a message in it then make sure you don’t stick the eyes over the gap in the arm folds and unfold it, write your message and refold.

8) Give as gift or pop onto the corner of the page you need to keep tabs on 🙂

Making Muse Monster page corners

These can also be used as mounts for photos in albums or to create home made frames.

January 1, 2017

Resolution and Goal Setting Jar

Filed under: Christmas,Paper Craft,Seasonal — sarah @ 10:37 pm

Happy New Year everyone 🙂

New Years Resolutions and Goal Setting Jar

New Years mean resolution making, this is what we have done this year – it is a resolutions and goal setting jar.

Needed:

Large jar A4 coloured paper (one colour for each person contributing to the jar) Scissors or paper gillotine Loom bands/small hair bands/small elastic bands pencil (preferably small) Small draw string bag

Divide the A4 sheets into 8 rectangles each, this can be done by either measuring or folding each piece in half three times. The write the resolutions or goals onto the small rectangles, you can include action plans or tick lists if you wish. Then roll up the small piece of paper and secure with loom band and place in jar.

If there is space left in the jar put spare rectangles in there with small pencils and bands contained in a small bag so that people can continue adding goals through out the year. Leave in prominent place so that you do not forget your goals, and take our for review on a regular bases. For those who don’t want others to read their goals stickers can be used as seals instead of bands and “do not read” can be added to the finished scrolls.
January 18, 2015

The Maps of The Imagination

Filed under: My Drawings/Paintings,Paper Craft — sarah @ 12:01 pm

The Maps of Imagination

I was once upon a time a geologist and have mapping pens still kicking around, I also have lots of old maps of various sorts (some are the sort you frame most aren’t), and I was poodling around on Pinterest and saw some fun map projects and there some little creatures I had been meaning to draw for a while.

So I have started work on a series call The Maps of The Imagination which are going to be for sale at The True Believers Comic Festival. Pretty much there is only going to be the actual drawings rather than any books.

This is a photo – I need to get around to scanning at some point 🙂

This is also only the beginning of the map projects 🙂

March 9, 2014

Spring has Sprung

Filed under: Art and Drawings,Easter,Paper Craft,Seasonal,Upcycling — sarah @ 12:43 pm

Spring Has Sprung Button Flower Upcyling picture

Glue – we used a latex based glue like copydex
Buttons – a mix of sizes and colours namely, pink, green, yellow
Patterned cardboard – we used graze boxes as they tend to have nice grass and flower patterns on them and are just the right size to cut up for these pictures
Scissors
Piece of ribbon or cording for the handle
Gold paint pen

Mary cutting up cardboard

Cut out two rectangles of card, select which one you want for the background of the picture and which one you want for the frame. Make sure the are the same size. For the frame cut a 2 cm strip along the bottom stopping 2 cm from the edge, turn scissors 90 degrees and cut a strip 2 cm wide up the edge until 2 cm from the top, turn 90 degrees and cut along the top again stopping 2 cm from the edge, now turn scissors again and cut down the side until you get to the first cut. A smaller rectangle of card should now pop out leaving you with a frame – put this to one side for now.

Laying out buttons for spring upcycling picture

Lay out the buttons you have chosen in the shape you want, check that it will fit within the frame and then glue them in place.

Frame and handle added to button picture

Cut a piece of ribbon or cord for your handle and glue it in place – ribbon works better as the frame can side flat over it. An alternative is to stick the handle on the back but you will have to wait for the picture to dry before you can do this. Glue the frame in place pinching down over where the hand is – cloths pegs can help as mini clamps if it is being problematic.

Mary colouring in with gold paint pen

Draw or write with paint pens – I did a wrote Spring and then drew a spring as an exclamation mark.

Spring Has Sprung Button Flower Upcyling picture

This is my creation – the toddler spilt her milk on her one, it was a sheep and she had given it gold ears.

January 19, 2014

Geeky Tissue Box

Filed under: Paper Craft,Papier Mache,Upcycling — sarah @ 10:03 am

Circuit board tissue box

For this tissue box I used PVA glue watered down – 5 parts water for one of the glue, graphs and circuit diagrams cut out of an old technical manual (pages have to be thin and not glossed for this to work well), and a tissue box that I picked up in a cheap shop in Cheltenham. It would be relatively easy to make the box yourself if you have a jigsaw etc…

supplies to make the geek tissue box

I cut out the pictures I wanted to use – large graphs for the main background, circuit diagrams and pictures of transformers for the images. I used a paint brush to paint the watered down PVA glue onto the box, then I painted a picture at a time with it and laid the ‘painted’ side down on the box. Using the paint brush and my fingers I smoothed any wrinkles in the paper out.

To make it extra neat and prevent flacking edges, I wrapped the paper up underneath the bottom edge of the box and made sure it was smoothed off on the in side, I tried to avoid edges of pictures occuring at corners and edges.

corners

For the hole where the tissues will come out I cut little slits into the pictures along one edge before pasting them on. For the more curved bits I the lines into the picture radiating for the some point on the edge of the picture. Both these ways of cutting the edge of the picture gave me flaps I could glue into place though the hole in the inside of the box.

For the corners I cut the pictures in half up until the middle of the image so I ended up with a piece of paper with two ‘legs’. I then pasted it onto the box with the legs sticking up from the sides I folded them over one at a time so that one leg sat over the other.

I then left it to dry raised up on some plastic cups. For a longer life I am going to attempt to vanish it.

Geekery tissue box craft

February 10, 2013

No Strings Attached Booklet

Filed under: My Books,Paper Craft — sarah @ 12:04 pm

No Strings attached

I made this little Visual Poetry booklet as a source of inspiration to other poets and writers I meet up with. I looked through magazines and selected the words I wanted – chosen for what they said and the type face used. I then cut strips of card using the bell scissors out of my shape cutting scissors. I punched a whole in the corner of each strip using a whole punch, using pritt stick I glued the words onto the card strips and selected some lovely varigated coloured eyelash wool which I used to tie it together.

Vispo booklet

November 4, 2012

Upcycled Vase of Flowers

Filed under: Paper Craft,Upcycling — sarah @ 11:48 am

This vase of flowers was made from an old copy of the magazine New Scientist.

Upcycled Flowers

Items needed for this project:

  1. an old magazine

  2. Pritt Stick type glue

  3. Copy dex or decoupage glue

  4. Scissors

  5. Cleaned and de-labeled tin can (if you are doing the craft project with kids then it is advisable to put a strip of heavy duty tape like gaffa tape along the top of the can and fold it down either side to cover any sharp edges).

  6. On old jumper or scrap cloth

First of all I removed the pages and cut some of them in half across the text so I had ‘fat’ rectangles rather than ‘thin’ ones. I put these to one side and then cut some other pages into quarters.

I took a quarter and smothered one side of it in Pritt Stick and then rolled in up over itself to make a tube. Some people may find this hard to do in which case a wooden skewer or bamboo stick can be used to wrap the paper around. Those who do a lot of paper craft may have a special tool for this but it is. Be careful at what angle you roll the paper at as it produces different styles and strengths of straw. I prefer rolling from one corner at an approximately 45 degree angle.

rolling a magazine page into a construction straw

This creates paper construction straws relatively short for sticking to the side of your tin can. How many straws you will need will depend on the size of your can and on how tightly you rolled the straws, the tighter the better to be honest. When you get to the end of rolling a straw it is important to put just a little bit of glue on the tip before laying it flat on the side of the straw If you do not do this you will have a flap on you straw which will get caught and slowly unravel it.

hamemade constructions straws and tin can

I think covered the tin can in copydex glue and wrapped a a half sheet of magazine around it. this didn’t quiet go all the way around so I suck a second one on making sure that there was some paper sticking up over the rim of the can.

Cover tin can in magazine paper

I then snipped the over hang of paper with a cm gap inbetween each cut so I had lots of tags sticking up. I then glued this down over the rim of the tin can.

snip cm wide flaps in the over hanging paper so you can fold it over can lip

I then had a tin can covered in magazine paper.

tin can covered in magazine paper

I then snipped off on of the pointy ends on all the paper straws I had made. And using the copydex still began to glue them onto the side of the tin can in an upwards direction.

Stick construction straws on tin

I left the straws pointy at one end and different lengths to imitate actual straw that grows and has been used for making corn dollies and things for centuries but you can trim them down and maybe make a rim for the vase if you like.

straw covered tin can

I then made the flowers to go inside the vase, today this I cut more pages into quarters and then folded each sheet into quarters. I then cut a leaf or petal shape out of the rectangle of folded paper being careful not to cut too near one corner which is where the middle of the sheet actually is! This gave me a nice four petalled flower. I used the Pritt Stick to lay two or three lots of petals together with the petals off set slightly (I put the second sheet down so that the petals were inbetween the first sheets petals). I placed the petal sheets over a loop I’d made with my thumb and fore finger and pushed the center of the flower in, I pinched the pushed through bit and twisted it which made the flower bit of the flowers.

For the stems I simply made larger construction straws using the half sheets I’d cut at the beginning. I snipped of the top pointy bit and using a blob of copy dex glued the flowers to the stems and left them to dry for a bit.

magazine flower

I then cut a strip of brown fabric from an old top and tied it around the vase and then placed the flowers in it. I ran this as a workshop at the Green Unconference in Long Ashton which went really well.

October 28, 2012

Green Unconference and Upcylcing

Filed under: Events,My Books,Paper Craft,Upcycling — sarah @ 12:27 pm

Yesterday I attended the first ever Green Unconference in Long Ashton near Bristol, organised by Daniel Lewis. It was an amazing setting with brilliant speakers – I only wish more of the people I’d invited had turned up but apparently most of them hadn’t seen the FaceBook invite until the event was actually taking place 🙁

Daniel Lewis opening the Green Unconference Lady speaker at the Green Unconference Diodynamic farmer giving his talk at the Green Unconference

I have come away saddened but optermistic and re-energised about the stuff I do to try and be a bit more friendly to the planet. Everything from government policies to how to garden to how to save/use waste food to feed those who are increasingly needing to use the food banks in this country was covered. I myself did an Upcycling and Junk Art workshop – complete with a mini talk and slides.

Sarah Snell-Pym explaining Ucycling and Junk Art at All Saints Church Long Ashton at the Green Unconference

It was the most gorgous setting for a workshop and I had my visual poetry stuff with me as well which a couple of people stayed on to do as a mini workshop. The workshop was making a vase of flowers out of old magazines.

Beautiful backdrop for the Upcycling and Junk Art Workshop Upcycling and Junk Art workshop at the Green Unconference Visual Poetry of one of the participants of the Green Unconference 2012

My little girls were about as well behaved as I think I could realistically expect :/ I think Jeany eat most of the buffet before we officially had stopped for lunch!

Sisters sharing food whilst being relatively good at the Green Unconference The family lunching at the Green Unconference near Bristol

I’m glad that people are taking on board that the average family can not afford or percieves at the least that they cannot afford organic food and that steps are being taken towards sorting this out. I wish I had managed to catch a few more of the talks but they clashed with my workshop and we had to leave early due to having triple booked ourselves for the day :/

I am going to attempt write up a few more of my junk art and upcycling projects. In making the slide show I realised I had a lot of material which I may try to collect together into at minimum an ebook. I have had people asking me to do this for a while now but haven’t had time what with all those workshops and other publishing projects on the go 🙂

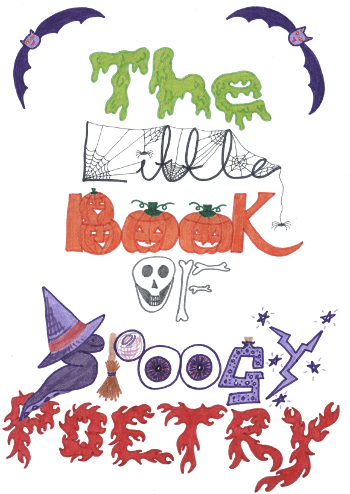
And talking of e-books don’t forget to download your copy of The Little Book of Spoogy Poetry before midnight on the 31st of October! Click the image below for your free PDF.

The Little Book Of Spoogy Poetry

September 2, 2012

Tardis Decorations

Filed under: Paper Craft — sarah @ 4:03 pm

Door Tardis

The theme of my little girls party this year was Dr Who and to my horror I could not find anything in the the shops for theming the party 🙁 Now we had been hunting themed presents which would go out as sort of decorations – little darleks and things and I found cake toppers on line but too late. So I ended up having to make cakes and decorations myself.

For the card Tardises (Tardii?) I cut out blue rectangles of card, little squares of white paper and little trapisiums of yellow card.

Bits for making a card tardis

Using a dark blue felt tip pen I draw a line across the top and then a line going down from that cutting the rectangle in half. I then used pritt stick to glue on some of the white squares as windows and then drew the door handle, keyhole and door panels in. Using a silver metallic paint pen I then wrote Police Box on the top and stuck on the yellow card as a light.

card tardis

These came in handy all over the place! Including attatched at a piece of finger knitting I had strung across the room as a sort of bunting!

This was a great project for the kids to copy as well 🙂 Just before they all sat down to watch the new Dr Who box sets Jean had been given for her birthday (along with sonic screw drivers, Dr Who Books and an annoying talking card that says you have to cellebrate or be exterminated (she wants to know if I want her to get the card as I’ve written the words down not exactly right! I have said no but she has gone to get it anyway NOOOOOOO!))

Next Page »